# Git-enabled Apps
## Introduction
JourneyApps offers git-based [version control](https://docs.journeyapps.com/reference/get-started/journeyapps-fundamentals/creating-a-new-app/..#version-control) for your apps. This document shows how to create git-enabled apps and configure [GitHub](#github) or [Azure DevOps](#azure-devops-beta) (Beta) as your git provider.
### Enable git-based version control
Git can be enabled for new apps and for existing apps that previously were created with "Basic (Revisions)" version control.
#### New apps
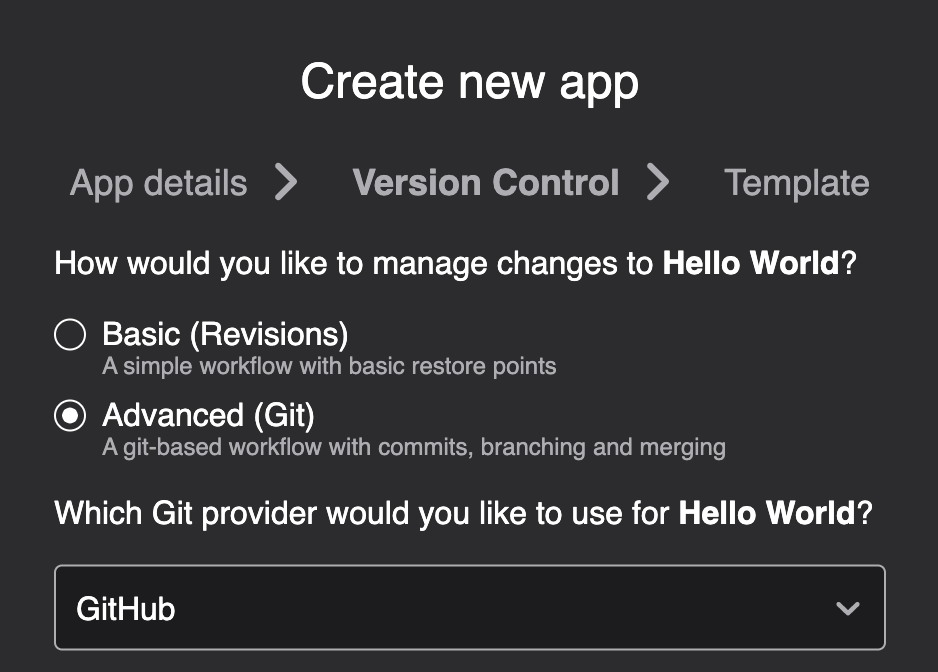
As part of the workflow to [create new apps](https://docs.journeyapps.com/reference/get-started/journeyapps-fundamentals/creating-a-new-app), select **Advanced (Git)** and **GitHub** or **Azure Repos** as the git provider in the Version Control tab:
#### Existing Apps
In the [admin portal](https://accounts.journeyapps.com/portal/admin/), hover over an existing app that has "Basic (Revisions)" version control enabled:
Click the "Version control" button, and subsequently the "Change to Advanced (Git)" button.
Finally, click the "Git provider" button to set up GitHub or Azure Repos as the git provider. See the next sections.
### Create a GitHub / Azure DevOps Integration
The first step to linking apps to either GitHub or Azure DevOps is to ensure an integration exists between your JourneyApps organization and your GitHub organization or Azure DevOps profile respectively.
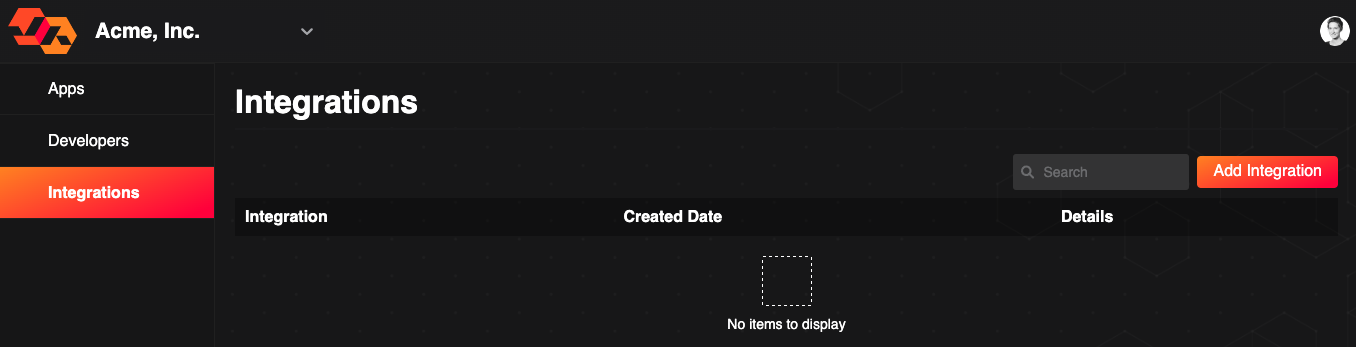
You can review existing integrations for your JourneyApps organization by navigating to the Integrations tab in the admin portal:
Create a new integration by clicking the "Add Integration" button. Select the integration you want to add - either GitHub or Azure DevOps, and press Next:
Proceed to the next sections for [GitHub](#github) and [Azure DevOps](#azure-repos-beta) specific details following the above step.
## GitHub
### GitHub configuration
After selecting GitHub when [adding a new integration](#create-github-azure-repos-integration), proceed to follow the on-screen steps in GitHub. These include:
1. Selecting a GitHub organization or your GitHub user account for the integration (this is where your app's repositories will be created)
2. Installing the JourneyApps GitHub app in the selected GitHub organization / user account.
1. Selecting which of the organization's / user account's repositories to include in the integration
When these steps complete successfully in GitHub you will be redirected to the admin portal, and the new integration will be listed. The integration can now be used for git-enabled apps.
{% hint style="warning" %}
There are some known limitations and a few noteworthy edge cases when integrating with GitHub. Please see the [GitHub Limitations & Troubleshooting](#limitations-and-troubleshooting) section below if your integration does not complete successfully.
{% endhint %}
### Select GitHub Organization and Configure Repo
Once you have created an integration for the GitHub organization or user account, you will be able to select when creating a [new app](#new-apps) or updating the git provider for an [existing app](#existing-apps):
**Note**: If you get to this step prior to setting up an integration with the GitHub organization / user account you want to use for your app, you will see a convenient link to set up the integration first:
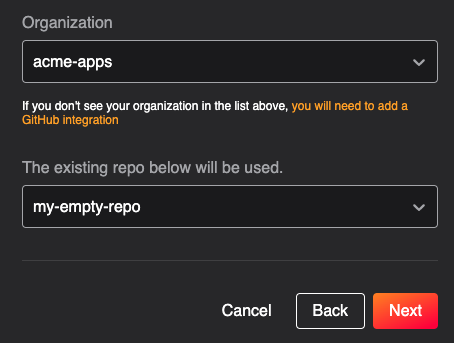
Once you have selected your GitHub organization, you need to choose the repo that will store your app's codebase. You can either select an existing repo (all repos that were included when setting up the integration will be listed in this dropdown) or create a new repo by typing a new name into the dropdown field:
Selecting an existing repo - ensure it is empty or can be overwritten
Creating a new repo by typing the repo name
Pressing Next completes the GitHub setup.
{% hint style="warning" %}
**Known limitation**
When selecting a GitHub user account you can only select an existing repository for your app, not create new repository from JourneyApps. We suggest you create a new empty repository for your app in GitHub first. This limitation does not apply to GitHub organizations.
{% endhint %}
### GitHub Limitations & Troubleshooting
#### Branch protection
If you want to enable Branch Protection, or any other similar Github rules, make sure that the `journeyapps-platform` GitHub App (which you granted access previously) has administrator-level access to your GitHub repos. Practically, for Branch Protection it means the following minimum settings to ensure branch protection will work with GitHub integration (at least in so far as not allowing direct pushes to the protected branch and requiring PRs instead):
The setting ‘Do not allow bypassing the above settings’ is needed to ensure that even repo administrators, like the JourneyApps GitHub app, adheres to these rules.
#### GitHub members vs owner permissions when creating new integrations
If you are only a member (not an owner) in the GitHub organization you wish to integrate with, you will need an owner's approval to complete the integration setup in JourneyApps. As a member you be able to complete the [necessary steps in GitHub](#github-configuration), but your integration will remain in a pending state until an owner completed the setup (they should receive an email with a link to approve and complete the integration request). The admin portal will notify you when this is the case:
#### Integrating a GitHub organization with multiple JourneyApps organizations
It is possible to integrate a GitHub organization with multiple JourneyApps organizations, however only owners for the GitHub organization will be able to create the subsequent integrations.
#### GitHub 400 validation error
When a GitHub organization's member initiates a new integration, there is a known edge case where the integration attempt could result in a 400 VALIDATION\_ERROR. If this happens, an owner for the GitHub organization should create the integration.
#### Disabled "Save" button in GitHub
Another known edge case could result in the "Save" button being disabled [when selecting repositories in GitHub](#github-configuration). To resolve this, ensure at least one repository is selected, and you may need to toggle the repository selection back and forth to "activate" the button.
## Azure DevOps (Beta)
{% hint style="warning" %}
Azure DevOps support is currently in **Beta**. Current known limitations are:
1. You need to be the owner of your Azure DevOps organization to integrate with JourneyApps.
2. Azure repo names cannot contain spaces.
{% endhint %}
### Azure DevOps Installation
If you are adding an [Azure DevOps integration](#create-github-azure-repos-integration) for the first time, you will need to grant access to the **journeyapps-platform** app for certain permissions in your Azure account.
If access has been granted, you will be redirected to the admin portal and prompted to select the Azure DevOps Organization and Project for the integration. Repos are stored within projects in Azure, hence the Azure integration is project-based.

Press Next to complete the Azure DevOps integration setup. The integration can now be used for git-enabled apps.
### Select Azure DevOps project and Configure Repo
{% hint style="info" %}
**Azure DevOps vs Azure Repos**
Azure Repos is a feature of Azure DevOps that stores git repositories.
In JourneyApps, an integration is set up with Azure DevOps, but we generally refer to Azure Repos when referring to the git provider, i.e. the service that hosts an app's git repository.
{% endhint %}
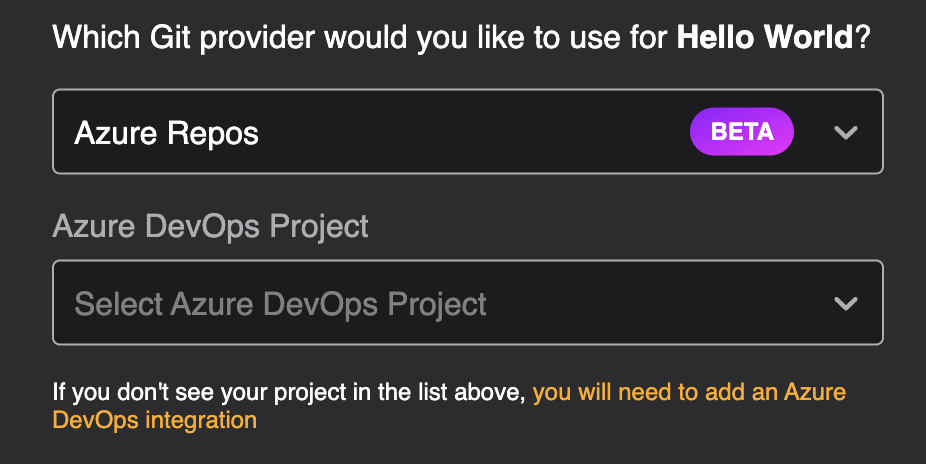
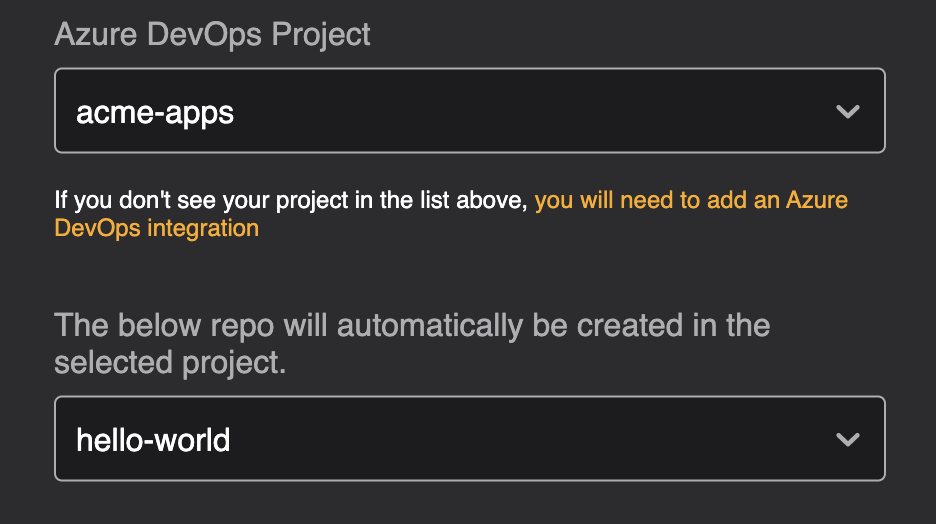
Once you have created an integration for the Azure DevOps project, you will be able to select the project when creating a [new app](#new-apps) or updating the git provider for an [existing app](#existing-apps):
**Note**: If you get to this step prior to setting up an integration with the Azure DevOps project you want to use for your app, you will see a convenient link to set up the integration first.
Once you have selected your Azure DevOps project, you need to choose the repo that will store your app's codebase. You can either select an existing repo or create a new repo by typing a new name into the dropdown field:
Pressing Next completes the setup for hosting your app's git repository in Azure Repos.